

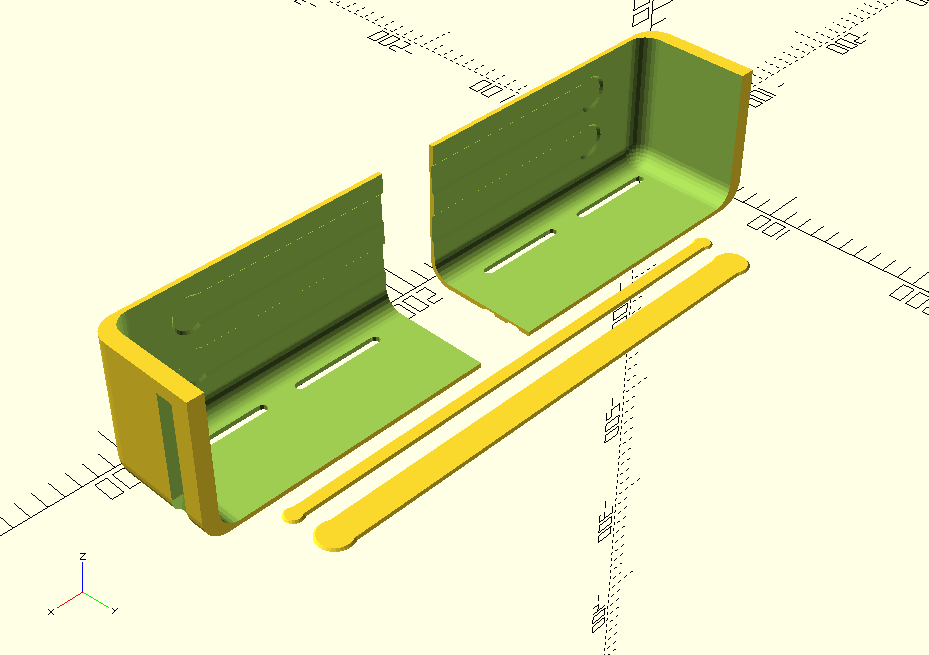
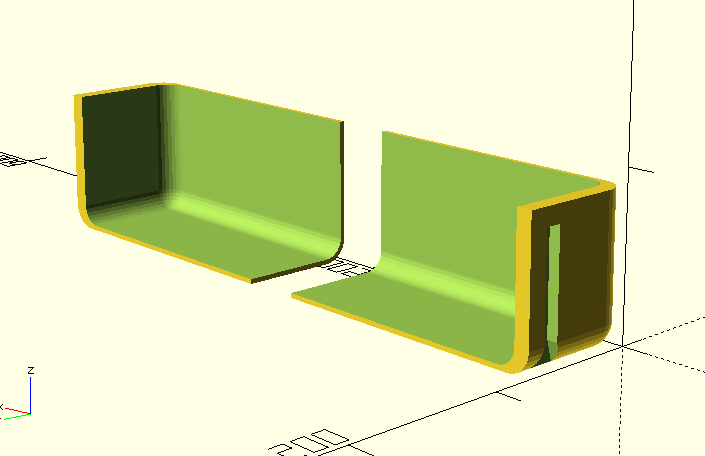
I’m working on a replacement for a broken shelf in my fridge door. It’s about 37.6 cm (14.8") on the longest axis so I need to print it in two pieces (as shown in the screenshot). Does anyhone have a good idea for a connection between the two that will be sturdy enough? The fridge door will support it from below for about half of its depth, the rest hangs free.
Wall thickness is currently at 3mm but I can increase it a bit if needed.
You may want to do some research into Japanese wood joinery. There are some amazing techniques out there. Just one of them…

I believe this one is called the double penetration
I scarf at that

Also, spline:

Blind dove:

And Book “The Complete Guide to Joint Making” by John Bullar – at you (not recommended or anything, I got it for a few bucks back when Better World sold stuff dirt cheap on eBay):

Also @OP: if you’re using PLA, I have heard good things about Weld-on 4 acrylic adhesive.
The what now?
I would extend one side and raise it over the other, so there’s a small overlapping lip to glue the two half’s together, that should be strongest.
or even a center strip that “staples” the two halves together with pegs running through holes in the two halves (probably sturdier than glue but also uglier)
If you’re willing to change up the design aesthetic and have other materials lying around (e.g. dowels, rods, some kind of sheeting), you could also just print the “end caps” with slots for the main body.
This also has the advantage of being sturdier and maybe easier to print, but the design might be more involved.
I would make two horizontal slots along the bottom of the tray, maybe 2-3cm wide and as long as you’re able to print on your printer (pro tip: rotate long skinny models 45° to get ~40% extra length by printing corner to corner). Or even better, if you’ve got some spare sheet metal laying around throw those in the slots.
That’s the one I went with. Two at the bottom and two on the inside of the wall
Nice! Looks good.
I’d thicken the bottom, and then have the interface have some pegs/holes to fit together like a puzzle. If you’re printing in that orientation the pegs should be unlikely to shear off. Then, lots of super glue and sand it down. As others have said, a lip underneath the interface would give you more surface for super glue as well.
Because it’s going in your fridge, there will be inevitable spills that need cleaning. So I’d want to minimize the seam and complexity on the interior of the container.
What you want to maximise is overlapping surface area and glue.
How you get there will depend on your CAD skills.
One option is to print a 3rd sleeve that you push both parts into. Another option is to cut a 1.5mm deep slice out of the top face of the left part, and a 1.5mm slice out of the bottom of the right part so they slot together with as much surface area overlapping as possible.
https://youtu.be/FzCm1iTf8PA?si=Dj3qrD-Y1CNDwMjB might be helpful, but all the examples are about quite chunky parts.

